VirtualBox
VirtualBox is a virtualization tool that allows you to run a guest operating system on a host operating system. The guest operating system interacts with a virtual machine, that is implemented running on the host operating system and simulates the physical hardware the guest operating system expects to run on (in this case, an x86 or AMD64 processor and other hardware devices). Later in the course, we'll talk about virtualization techniques.
For the course, we will use Ubuntu, an operating system built on the Linux kernel. VirtualBox runs on Mac OS X, Windows, and many Linux variants, so we expect everyone in the class will be able to have the same working environment by using VirtualBox and the image we provide. (If you do not have reasonable access to a computer capable of running VirtualBox, please let me know right away.)
Note: You are not required to use VirtualBox. If you prefer to set up your own native working environment that is fine and will have big performance advantages, but if you run into troubles with things not behaving as expected, the course staff is unlikely to be able to help you unless you are using the standard environment.
Setting up VirtualBox
-
Download VirtualBox from https://www.virtualbox.org/wiki/Downloads. (VirtualBox 4.2.16 was the latest version available when these instructions were written.) Binaries are provided for Windows, OS X, Linux, and Solaris, and follow the instructions to install it on your machine. (If you don't have access to a suitable machine, contact the course staff to make other arrangements.)
-
Download and install the VirtualBox Extension Pack: http://download.virtualbox.org/virtualbox/4.2.16/Oracle_VM_VirtualBox_Extension_Pack-4.2.16-86992.vbox-extpack
-
This step is for Mac OS X and Linux only! Run VirtualBox and set up a host-only network by selecting
VirtualBox | Preferences(orVirtualBox | File | Preferenceson Linux) to open the Preferences dialog. Select theNetworktab and click the+icon to "Add host-only network (lns)". You should see a networkvboxnet0added to the list of networks. ClickOK. -
Download the cs4414 image: cs4414-ubuntu-12.04.2-32bit-vdi.zip. The file is 1.5GB so go get a coffee (even decaf should work fine for this, although it has not been tested by the course staff). Save the file wherever you want to do your work for this course.
-
Extract it (for most systems this should happen automatically when you double-click it, if not, use
unzip cs4414-ubuntu-12.04.2-32bit-vdi.zip). (Be patient, this will also take a few minutes.) This will create thecs4414-ubuntu-12.04.2-32bit-vdisubdirectory wherever you do the extraction. -
Open the
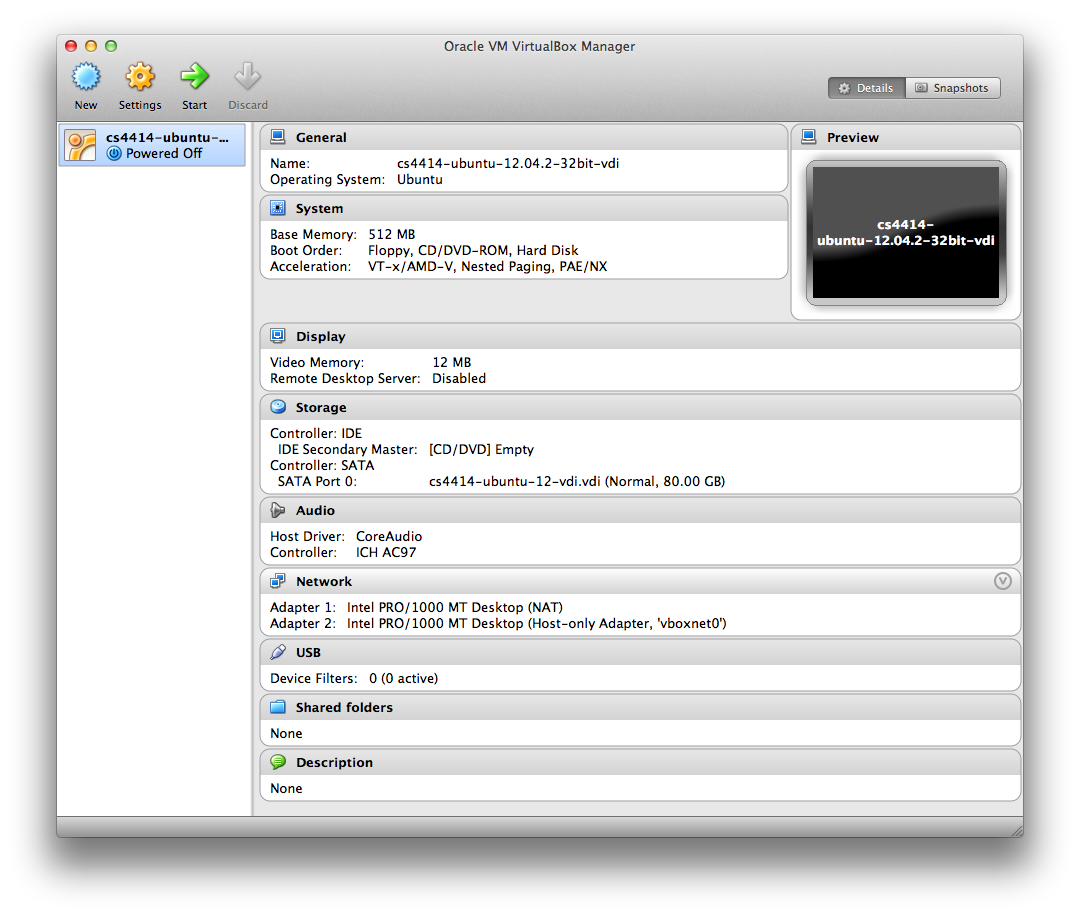
cs4414-ubuntu-12.04.2-32bit-vdi-on-Windows.vboxfile in that directory if you're using Windows, or open thecs4414-ubuntu-12.04.2-32bit-vdi-on-others.vboxfile instead if you are using another OS. (If you've installed VirtualBox, they should appear with a blue VirtualBox icon.)You should see something like this:
-
Start a new VM (click
Start) using this image. You might (or might not) get a few dialogs from VirtualBox about input capture, and then will see a window running Ubuntu. -
Login using password:
vm4student!(the username should already be filled in as UVa student)
You are now running Ubuntu on a virtual machine. Try running some programs in the VM. You should be able to browse external web sites using Firefox or Chrome, and start a shell using the Terminal.
About the Image
The image contains this software that you will use to get started in cs4414 pre-installed: